
 Art Students often ask about what kind of panels they should bring to workshops and classes: what size, type of preparation, etc. We asked Hollis Dunlap for his recommendations and he gave detailed instructions showing what he does to prepare panels. Hollis recommends small panels for landscape class: no larger than 12 x 16, but 8 x 10 and even 6 x 8 are good. He says that on a small panel you can cover the surface quickly and get into painting the details before the light and scene changes.
It is good to have (or know someone with) a table saw, and cut as many panels as you can in one sitting. The people at Home Depot will make a few cuts for you, but depending on who is working there, it can take a while to get something cut, and the cuts may not be accurate. Despite what that pictures may illustrate, wear gloves all the time! Use extreme caution operating a saw, etc.
For these panels Hollis purchased a 2 x 4 foot, 1/2 inch piece of birch plywood (around $15 a sheet) at Home Depot. Avoid thinner plywood because it will warp.
Cut into 12 x 16 inch pieces (or smaller), and sand all edges, being careful not to to get slivers from sharp edges of the wood.
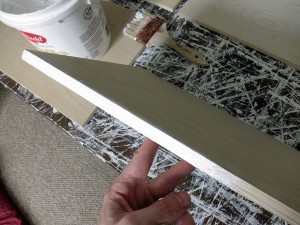
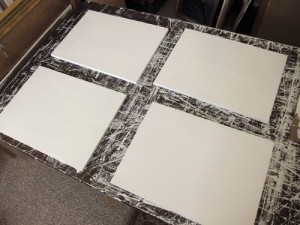
Using a brush, paint the edges with Utrecht professional acrylic gesso, then the front.
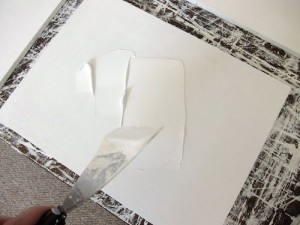 When dry (after one day), apply either one coat of oil priming white or gesso with a putty knife. Apply a layer just thick enough to cover the entire surface evenly. Oil priming white takes at least a week to dry. It is the preferable surface for oil painting due to its oil base. However, gesso is also OK for panel painting and takes one day to dry. Hollis bends the putty knife slightly which helps avoid ridges in the paint. However there will be some ridges as shown in the pictures. You can smooth them out by light sanding after the panel is dry. With some practice you will be able to get a finer surface with smaller ridges.